(Anonymous230385 asked me to grab some more pictures of the Guerrilla Ballard, so I did.) |
No edit summary |
||
| (23 intermediate revisions by 7 users not shown) | |||
| Line 1: | Line 1: | ||
| − | {{Quality-level| |
+ | {{Quality-level|7}} |
{{Infobox Vehicle |
{{Infobox Vehicle |
||
|image = [[File:Ballard M5B1 Scout.png|264px]] |
|image = [[File:Ballard M5B1 Scout.png|264px]] |
||
| Line 7: | Line 7: | ||
|weapons = Multiple, see below |
|weapons = Multiple, see below |
||
|rarity = Rare |
|rarity = Rare |
||
| − | |owners = [[ |
+ | |owners = [[Black Hand in JC1|Black Hand]]<br/>[[Guerrillas]]<br/>[[Montano Cartel]]<br/>[[Rioja Cartel]]<br/>[[San Esperito Military]]<br/>[[San Esperito Police Department]]<br/>Unknown<br/>[[San Esperito International Arms Fair|Export]] |
| + | |}} |
||
| + | |||
| + | |||
The '''Ballard series armored vehicles''' are military vehicles in [[Just Cause|Just Cause (1)]]. |
The '''Ballard series armored vehicles''' are military vehicles in [[Just Cause|Just Cause (1)]]. |
||
| − | There are 3 vehicles in this series |
+ | There are 3 vehicles in this series, only differing in the turret, so they are in the same article for convenience. |
==The 3 vehicles== |
==The 3 vehicles== |
||
| Line 20: | Line 23: | ||
===Performance=== |
===Performance=== |
||
| − | It's |
+ | It's velocity is not what expected from an armored vehicle, as it's pretty fast, though not comparable to any racing vehicle. It has a tendency to [[Drifting|drift]] a little on higher speeds. |
===Weapons=== |
===Weapons=== |
||
| − | The machine |
+ | The machine gun is visible as a small mounted gun below the right headlight. It does not appear to move, though it can aim and track at enemies. It has decent accuracy and damage, mowing down infantry units with terrifying ease. |
| + | Each varraint has a different primary weapon, a turret that has coverage at all directions. It's glitchy, as turning it may cause the vehicle to lose control. |
||
'''Ballard M5B1 Scout:''' |
'''Ballard M5B1 Scout:''' |
||
*Has the [http://en.wikipedia.org/wiki/Gun_turret turret] of a [http://en.wikipedia.org/wiki/Tank tank], which appears to be a high-caliber 90mm cannon. |
*Has the [http://en.wikipedia.org/wiki/Gun_turret turret] of a [http://en.wikipedia.org/wiki/Tank tank], which appears to be a high-caliber 90mm cannon. |
||
| − | *Front [[Vehicle mounted weapons|machine |
+ | *Front [[Vehicle mounted weapons|machine gun]]. |
'''Ballard Sentry STRL - 14:''' |
'''Ballard Sentry STRL - 14:''' |
||
| − | *Has a multiple rocket- |
+ | *Has a [https://en.wikipedia.org/wiki/Multiple_rocket_launcher multiple rocket-launcher] turret. The rockets lose altitude quickly, allowing it to be used similarly to a howitzer. Theoretically, it can be used to kill enemies on the other side of a hill in this way. The rockets appear to be very large-caliber munitions, anywhere between 155mm to 200mm. |
| − | *Front [[Vehicle mounted weapons|machine |
+ | *Front [[Vehicle mounted weapons|machine gun]]. |
'''Ballard Centronel AAWV- 21:''' |
'''Ballard Centronel AAWV- 21:''' |
||
*Has a quad anti-aircraft autocannon turret, with a little radar antenna. The cannons appear to be of either 20mm or 30mm caliber; too large to be considered machine guns. |
*Has a quad anti-aircraft autocannon turret, with a little radar antenna. The cannons appear to be of either 20mm or 30mm caliber; too large to be considered machine guns. |
||
| − | *Front [[Vehicle mounted weapons|machine |
+ | *Front [[Vehicle mounted weapons|machine gun]]. |
===Survivability / armor=== |
===Survivability / armor=== |
||
| Line 44: | Line 48: | ||
This version has the turret of a tank. |
This version has the turret of a tank. |
||
| − | Being armed with a [http://en.wikipedia.org/wiki/Tank_gun |
+ | Being armed with a [http://en.wikipedia.org/wiki/Tank_gun tank gun], it's effective against all targets. A skilled operator can even shoot down helicopters. |
There's a unique unmarked brown one hidden in a forest. The area has a few small houses and there are civilians walking around, but it's not known who owns it. It may be privately owned, or the area may be a hidden/abandoned military outpost. It's located in a small valley, surrounded by steep cliffs. The jungle keeps it completely hidden from aerial observation. Unless you want to jump off a cliff, it can only be approached from the north. The valley entrance has a wire fence with barbed wire at the top edge - just like the fences around some [[Military bases in San Esperito|military bases]]. There's a gap in the middle of the fence, so it's not really obstructing anything. Be careful when driving it out, as the [[Red Barrels|red barrel]] next to some wooden boxes will explode when hit. The vehicle would survive the explosion, but it would remove about 25% of its health. |
There's a unique unmarked brown one hidden in a forest. The area has a few small houses and there are civilians walking around, but it's not known who owns it. It may be privately owned, or the area may be a hidden/abandoned military outpost. It's located in a small valley, surrounded by steep cliffs. The jungle keeps it completely hidden from aerial observation. Unless you want to jump off a cliff, it can only be approached from the north. The valley entrance has a wire fence with barbed wire at the top edge - just like the fences around some [[Military bases in San Esperito|military bases]]. There's a gap in the middle of the fence, so it's not really obstructing anything. Be careful when driving it out, as the [[Red Barrels|red barrel]] next to some wooden boxes will explode when hit. The vehicle would survive the explosion, but it would remove about 25% of its health. |
||
| Line 52: | Line 56: | ||
See the video section at the bottom of the page. |
See the video section at the bottom of the page. |
||
| − | + | Its turret looks similar to miniaturized turrets of the [https://en.wikipedia.org/wiki/Panther_tank PzKpfw. V tank] or [https://en.wikipedia.org/wiki/T-34 T-34/76]. |
|
===Locations and users=== |
===Locations and users=== |
||
| Line 63: | Line 67: | ||
|Green |
|Green |
||
| |
| |
||
| − | *Appears during some "[[liberation]]" |
+ | *Appears during some "[[liberation]]" missions in military base, town, and city liberations. Often times get blown up by missiles during city liberations. |
| ⚫ | |||
|- |
|- |
||
|[[San Esperito Military]] |
|[[San Esperito Military]] |
||
| Line 69: | Line 74: | ||
| |
| |
||
*Octava [[Military bases in San Esperito|military camp]] (just north-west of the [[Just Cause Safehouses#Guerrilla 30 Campo Barranco|Guerrilla 30 "Campo Barranco" safehouse]]. |
*Octava [[Military bases in San Esperito|military camp]] (just north-west of the [[Just Cause Safehouses#Guerrilla 30 Campo Barranco|Guerrilla 30 "Campo Barranco" safehouse]]. |
||
| − | *Appears during some "[[liberation]]" |
+ | *Appears during some "[[liberation]]" missions in military base, town, and city liberations. |
| + | *Appears in [[Sink the Buccaneer]] and [[Taking Out The Garbage]] Vol. 1. |
||
| − | *Appears during some storyline missions. |
||
|- |
|- |
||
| − | |[[Black Hand]] |
+ | |[[Black Hand in JC1|Black Hand]] |
|Black |
|Black |
||
| |
| |
||
| − | *Appears during some |
+ | *Appears during some sidemissions. |
| + | *Appears in Taking Out The Garbage Vol. 1. on [[Isla Dominio]]. Technically savable in a garage, via amphibious transportation back to mainland [[San Esperito]]. See the bottom of the page for how to do this. |
||
| ⚫ | |||
| − | *On [[Isla Dominio]]. |
||
|- |
|- |
||
|[[Rioja Cartel]] |
|[[Rioja Cartel]] |
||
| Line 88: | Line 92: | ||
| |
| |
||
*A hidden location in a forest between some hills. In [[Provincia de los Guererros]], see the pictures. |
*A hidden location in a forest between some hills. In [[Provincia de los Guererros]], see the pictures. |
||
| + | *One appears as the Black Hand Tank Commander in [[Taking Out The Garbage]] Vol. 1. |
||
|- |
|- |
||
|[[San Esperito Police Department]] |
|[[San Esperito Police Department]] |
||
| Line 111: | Line 116: | ||
====[[Black Hand]] version==== |
====[[Black Hand]] version==== |
||
| − | *These pictures were taken on [[Isla Dominio]]. |
+ | *These pictures were taken on [[Isla Dominio]] except for the last one, which was taken at [[Just Cause Safehouses|Guerrilla Safehouse 31.]] |
<gallery> |
<gallery> |
||
Black Hand Ballard M5B1 Scout Front Quarter.png |
Black Hand Ballard M5B1 Scout Front Quarter.png |
||
| Line 123: | Line 128: | ||
Ballard M5B1 Scout (Black Hand, front).png |
Ballard M5B1 Scout (Black Hand, front).png |
||
Ballard M5B1 Scout (Black Hand, rear).png |
Ballard M5B1 Scout (Black Hand, rear).png |
||
| + | Black_Hand_Ballard_M5B1_Scout_Mainland.jpg|In front of Guerrilla Safehouse 31. |
||
</gallery> |
</gallery> |
||
<br clear=all/> |
<br clear=all/> |
||
| Line 172: | Line 178: | ||
Ballard M5B1 Scout (unmarked, brown, hidden).png|Brown hidden variant. |
Ballard M5B1 Scout (unmarked, brown, hidden).png|Brown hidden variant. |
||
Launched Ballard.png|The turret glitch doesn't just affect the player. The vehicle in the foreground is a [[Harland DTWV-2 AA gun]]. |
Launched Ballard.png|The turret glitch doesn't just affect the player. The vehicle in the foreground is a [[Harland DTWV-2 AA gun]]. |
||
| − | Ballard M5B1 Scout (at Rioja 04 safehouse).JPG|This is one of the few vehicles that can drive to Rioja 04 Eagles Nest. Other vehicles that can do this are [[The Vampire]], [[Rotor industries ATRV]] and |
+ | Ballard M5B1 Scout (at Rioja 04 safehouse).JPG|This is one of the few vehicles that can drive to the [[Just Cause Safehouses#Rioja 04 Eagles Nest|Rioja 04 "Eagles Nest" safehouse]]. Other vehicles that can do this are [[The Vampire]], [[Rotor industries ATRV]], [[MV]] and other vehicles with relatively good off roading abilities. |
Ballard hull machine gun.png|Close-up of the hull-mounted machine gun. |
Ballard hull machine gun.png|Close-up of the hull-mounted machine gun. |
||
</gallery> |
</gallery> |
||
| Line 178: | Line 184: | ||
==Ballard Sentry STRL - 14== |
==Ballard Sentry STRL - 14== |
||
| − | This version has a multiple rocket-launcher turret. |
+ | This version has a [https://en.wikipedia.org/wiki/Multiple_rocket_launcher multiple rocket-launcher] turret. |
The rocket-launcher has 12 visible rockets, but as all other vehicle weapons, it has infinite ammunition. The rocket-launcher cannot be effectively used against flying machines as it doesn't have much range. |
The rocket-launcher has 12 visible rockets, but as all other vehicle weapons, it has infinite ammunition. The rocket-launcher cannot be effectively used against flying machines as it doesn't have much range. |
||
| − | In the beginning cutscene of [[Broadcast News]], [[Tom Sheldon]] is playing JC1 ( |
+ | In the beginning cutscene of [[Broadcast News]], [[Tom Sheldon]] is playing JC1 (considered to be an [[Easter Eggs in Just Cause and Just Cause 2|easter egg]]) and he is controlling one of these. However, he doesn't have one in reality. |
===Locations and users=== |
===Locations and users=== |
||
| Line 195: | Line 201: | ||
*Caballeros [[Military bases in San Esperito|military base]]. |
*Caballeros [[Military bases in San Esperito|military base]]. |
||
*Costa Brava [[Military bases in San Esperito|military base]] (south-west of the [[Just Cause Safehouses#Guerrilla 31 Boathouse camp|Guerrilla 31 "Boathouse camp" safehouse]]). |
*Costa Brava [[Military bases in San Esperito|military base]] (south-west of the [[Just Cause Safehouses#Guerrilla 31 Boathouse camp|Guerrilla 31 "Boathouse camp" safehouse]]). |
||
| − | *Appears in several |
+ | *Appears in several sidemissions. |
|- |
|- |
||
| − | |[[Black Hand]] |
+ | |[[Black Hand in JC1|Black Hand]] |
|Black |
|Black |
||
| |
| |
||
*Appears in some [[Guerrilla]] sidemissions. |
*Appears in some [[Guerrilla]] sidemissions. |
||
| + | *On [[Isla Dominio]]. Technically savable in a garage, via amphibious transportation back to mainland [[San Esperito]]. |
||
| − | *On [[Isla Dominio]]. |
||
|- |
|- |
||
|[[Guerrilla]] |
|[[Guerrilla]] |
||
|Green |
|Green |
||
| |
| |
||
| − | *Appears during |
+ | *Appears during [[Taking Out The Garbage]] Vol. 1. |
|- |
|- |
||
|[[Tom Sheldon]] |
|[[Tom Sheldon]] |
||
| Line 216: | Line 222: | ||
|Purple |
|Purple |
||
| |
| |
||
| − | * |
+ | *Appears in a [[Rioja]] sidemission. |
|} |
|} |
||
| Line 279: | Line 285: | ||
*Appears during the mission "[[Sink the Buccaneer]]". |
*Appears during the mission "[[Sink the Buccaneer]]". |
||
|- |
|- |
||
| − | |[[Black Hand]] |
+ | |[[Black Hand in JC1|Black Hand]] |
|Black |
|Black |
||
| |
| |
||
*Appears in some [[Guerrillas|Guerrilla]] side-missions. |
*Appears in some [[Guerrillas|Guerrilla]] side-missions. |
||
| + | *On [[Isla Dominio]]. Technically savable in a garage, via amphibious transportation back to mainland [[San Esperito]]. |
||
| − | *On [[Isla Dominio]]. |
||
|- |
|- |
||
|[[Montano Cartel]] |
|[[Montano Cartel]] |
||
| Line 295: | Line 301: | ||
<gallery> |
<gallery> |
||
Ballard Centronel AAWV- 21.png|At the Octava military camp. |
Ballard Centronel AAWV- 21.png|At the Octava military camp. |
||
| − | Military |
+ | Military Centronel.png |
| − | Military |
+ | Military Centronel Rear.png |
| − | Ballard |
+ | Ballard Centronel AAWV-21 Rear.png |
| − | Ballard |
+ | Ballard Centronel AAWV-21 Top.png |
| − | Ballard |
+ | Ballard Centronel AAWV-21 Front.png |
| − | Ballard |
+ | Ballard Centronel AAWV-21 Back.png |
| − | Ballard |
+ | Ballard Centronel AAWV-21 Side.png |
| − | Ballard |
+ | Ballard Centronel AAWV-21 Turret.png|Close-up of the details on top of the Centronel's turret. |
| + | Ballard Centronel AAWV-21 front.jpg|Front view of Ballard Centronel AAWV-21. |
||
| + | Ballard Centronel AAWV-21 MG firing.jpg|Flash when firing machine gun. |
||
| + | Ballard Centronel AAWV-21 turret close-up.jpg|Ballard Centronel AAWV-21 turret closeup. |
||
| + | Ballard Centronel AAWV-21 turret close-up slanted.jpg|This is the lowest amount to that your mounted turret will go in this camera view. |
||
</gallery> |
</gallery> |
||
<br clear=all/> |
<br clear=all/> |
||
| Line 339: | Line 349: | ||
*For a certain period of time, the wiki stated that the Ballard's mounted machine gun was invisible, even though it is clearly visible on the front. |
*For a certain period of time, the wiki stated that the Ballard's mounted machine gun was invisible, even though it is clearly visible on the front. |
||
*Every faction in the game except [[The Agency]] has a variant of at least one of the three models of this vehicle. |
*Every faction in the game except [[The Agency]] has a variant of at least one of the three models of this vehicle. |
||
| + | **In fact, The Agency is the only faction that does not own a variant of the Ballard M5B1 Scout. |
||
| + | *From a screenshot from a video for Just Cause 4, a vehicle similar to the Ballard Centronel AAWV-21 returned as the [[Falconer AA Tank]]. |
||
| + | |||
| + | ==Acquiring the [[Black Hand in JC1|Black Hand]] variants from [[Isla Dominio]]== |
||
| + | While incredibly difficult and time consuming, it is technically possible to move a Ballard variant from Isla Dominio to the mainland of San Esperito via amphibious transportation with a [[Pequod - Harpoon PC 350]]. This will be a very challenging feat to pull off and may require plenty of trial and error before you do it successfully. Should you make the choice to attempt this, the steps to do it are as follows: |
||
| + | |||
| + | *Step 1: Liberate [[Hacienda Coronado]] in order to unlock Guerrilla Safehouse 31 - Boathouse Camp. While this is technically an optional step, it is highly recommended, as this is the closest safehouse to Isla Dominio. |
||
| + | *Step 2: Begin the first part of [[Taking Out The Garbage]]. |
||
| + | *Step 3: When you reach the [[Jaeger 5FJ 7]], turn around and head to the mainland. Then use [[Heavy drop]] to call in a [[Whiptail Gyrocopter]]. This step is optional, but will make your attempts much faster. |
||
| + | *Step 4: Fly over Isla Dominio and exit the helicopter, then paradrop down to the airfield on the south side of the island. You're aiming for an area about halfway along the airfield. with minimal trees that provide a commanding view of the road just to the west. |
||
| + | *Step 5 (optional): Hijack the [[Delta MAH-15 Chimaera]] that will spawn, then land it around the middle of the airfield, just behind your location. It can serve to reduce the helicopter spawning and provide a grapple point for you. |
||
| + | *Step 6: Watch the road and be patient. When the Ballard M5B1 Scout spawns, hijack it - but try not to go in while there are other vehicles otherwise they'll attack and potentially destroy you. If for whatever reason your attempt at hijacking it doesn't work, you can use the Chimaera as a grapple point to return to the airfield runway and wait for another chance. |
||
| + | *Step 7: Once you acquire the Ballard, drive down the airfield and turn off into the forests to the east. Then follow the shore until you reach a small clearing just before the SAM site near the corner of the shore. |
||
| + | *Step 8: Park the tank at the edge of the cliff and get out, then run down to the water and hijack a [[Pequod - Harpoon PC 350]]. |
||
| + | IMPORTANT: If you enter another vehicle after the Pequod, it will cause the Ballard to despawn. DO NOT enter any other vehicles. If you need to clear out any other boats, use your guns. |
||
| + | *Step 9: Drive the Pequod under the cliff, getting as close as you can, and line up the rear deck with the shoreline as best you can. It helps to tap the reverse button lightly, as the boat will then drift into the shore and stop completely. Don't let the boat drift, make sure it's as still as it can be. |
||
| + | *Step 10: Return to the Ballard and line up with the rear deck of the Pequod. Back up to the small hill just behind you, then floor it. Floor it at full speed and attempt to land straight on the back of the Pequod. If you land on the boat successfully, then now's the time to make any adjustments to secure the Ballard as best you can. You won't get a chance later. |
||
| + | *Step 11: Exit the tank and get in the Pequod. Now comes the hard part. |
||
| + | *Step 12: Going incredibly and extremely slow, gently begin sailing away from shore and move northward. Make sure you watch the wheels on your Ballard - because the tank moving will trick the game into thinking it's rolling, which will in turn make the wheels spin and exert a port or starboard force upon the Pequod that may be too strong to counteract depending on the wheel speed. Work with it if possible, but slow down if the force is too strong for you to counteract gently. Remember that moving slowly and keeping the Ballard on your back is your first priority. |
||
| + | |||
| + | '''IMPORTANT: DO NOT GET OUT OF THE PEQUOD AFTER THIS POINT''' |
||
| + | |||
| + | Normally when exiting a Pequod, Rico will appear on the back deck - right where the Ballard will be parked during this. Getting out will result in appearing inside the Ballard, which in turn will cause instant death, so if you need to get out of the boat (which you probably won't have to, anyway), use the [[stunt position]] instead. |
||
| + | |||
| + | *Step 13: While you're restricted to moving incredibly slowly, still try to get as far away from Isla Dominio as possible, as soon as possible. At any point during this step a Black Hand boat could spawn, or a helicopter, or any number of things that could then attack you and damage the boat or stop you from losing your [[Heat]]. |
||
| + | *Step 14: This step is pretty important: just relax and keep your fear under control. By this time, after having done the previous steps several times due to its tendency for failure and subsequent repetition, you'll probably be very nervous and fearful to lose your progress. To which I say, just breathe. After you're out of Isla Dominio's heat zone and you're free of the threat of the Black Hand, the only thing that can really stop you now is yourself. Don't get greedy, don't take any risks, just go slowly and gently. Keep your speed low and your turns (if necessary) gentle. Breathe and keep it under control. Relax. You'll be fine. You'll get there. It'll take as long as it needs to, just be patient and keep on sailing. |
||
| + | *Step 15: When you reach the mainland shore, beach the Pequod. You might need a slight (but careful) burst of speed as you're coming in, because it's good to try and completely beach the boat, leaving nothing but sand below it. As a result, if the Ballard falls off in its own here, then it'll be on the shore and you can continue. |
||
| + | *Step 16: '''DO NOT EXIT THE PEQUOD CONVENTIONALLY IF THE BALLARD IS STILL ON THE REAR DECK.''' If you've beached the Pequod and the Ballard is still on your back, use the Stunt Jump position to get to the roof of the boat, then leap off. After that, try to jump onto the deck of the Pequod itself. Once you're there, get in the tank and drive off. If you accidently get in the boat again, '''THEN I REITERATE YOU MUST USE THE STUNT JUMP POSITION TO GET OUT OTHERWISE YOU MAY INSTANTLY DIE.''' |
||
| + | *Step 17: Once you're inside the tank, drive off of the boat onto the beach. If you're stuck on the boat and can't move, (this probably won't happen to you, though, but just in case,) then use the physics glitch to dislodge yourself. Switch to the main cannon and wiggle it slightly to free yourself, then drive off onto the shore. |
||
| + | *Step 18: Go straight to Guerrilla 31. Technically you can go to any safehouse you want now, but after all the previous steps you'll want to save as soon as possible because you did it. So that's why you need Guerrilla 31 unlocked. |
||
| + | *Step 19: Put the Ballard in Guerrilla 31's garage, make sure you're far enough away for the door to close, then use grenades to kill Rico. The mission will fail, after which you can press abort and return to free roam. |
||
| + | *Step 20: You'll probably spawn at Guerrilla 31. Save the game - this is the earliest chance for you to do it, and you'll want to do it as soon as possible. |
||
| + | *Step 21: After the game is saved, go to the garage at Guerrilla 31 and celebrate. You did it - and you never have to do it again. |
||
| + | |||
| + | Attempting this, should you choose to do it, will be ''very'' time consuming and ''extremely'' difficult. It will most likely take multiple attempts, and plenty of trial and error to get right. Good luck. |
||
| + | |||
| + | ===Notes=== |
||
| + | *Theoretically this can be done for all land vehicles from Isla Dominio, though it has only been tested on the Ballards, so in other cases, this may not work. |
||
==Video== |
==Video== |
||
Revision as of 12:14, 23 February 2020
 Mr. Snowman thinks it's a start. |
| Ballard series armored vehicles | |
|---|---|
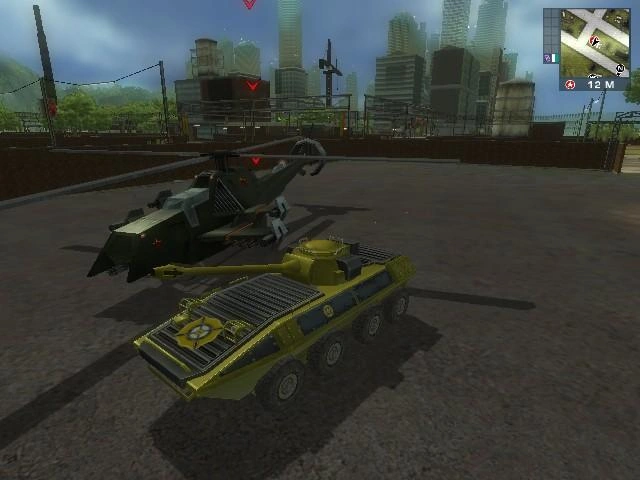 The Ballard M5B1 Scout. | |
| Vehicle in Just Cause | |
| Type | Series of infantry fighting vehicles |
| Weapons | Multiple, see below |
| Rarity | Rare |
| List of owners | Black Hand Guerrillas Montano Cartel Rioja Cartel San Esperito Military San Esperito Police Department Unknown Export |
The Ballard series armored vehicles are military vehicles in Just Cause (1).
There are 3 vehicles in this series, only differing in the turret, so they are in the same article for convenience.
The 3 vehicles
Appearance
The lower parts of the vehicles are identical. They have 8 wheels. Real 8 wheeled vehicles have at least 4 wheels that turn, but the game limitations don't allow more than the 2 front wheels to turn. The engine is at the rear. The rear ends of the side walls have fuel canisters connected to them. They all have invisible machine-guns at the right side of the front wall.
The vehicles don't appear to be based on any one real armored vehicle, instead they are made up of the elements of several. The body looks like that of the LAV-25/ASLAV, but the wheels are bigger, the Ballard series doesn't have rear doors and the much more powerful weapons would classify them as armoured fighting vehicles rather than light armoured vehicles (military armoured cars).
Performance
It's velocity is not what expected from an armored vehicle, as it's pretty fast, though not comparable to any racing vehicle. It has a tendency to drift a little on higher speeds.
Weapons
The machine gun is visible as a small mounted gun below the right headlight. It does not appear to move, though it can aim and track at enemies. It has decent accuracy and damage, mowing down infantry units with terrifying ease. Each varraint has a different primary weapon, a turret that has coverage at all directions. It's glitchy, as turning it may cause the vehicle to lose control.
Ballard M5B1 Scout:
- Has the turret of a tank, which appears to be a high-caliber 90mm cannon.
- Front machine gun.
Ballard Sentry STRL - 14:
- Has a multiple rocket-launcher turret. The rockets lose altitude quickly, allowing it to be used similarly to a howitzer. Theoretically, it can be used to kill enemies on the other side of a hill in this way. The rockets appear to be very large-caliber munitions, anywhere between 155mm to 200mm.
- Front machine gun.
Ballard Centronel AAWV- 21:
- Has a quad anti-aircraft autocannon turret, with a little radar antenna. The cannons appear to be of either 20mm or 30mm caliber; too large to be considered machine guns.
- Front machine gun.
Survivability / armor
They are completely bulletproof and they can survive 3 direct hits from rockets and the Ballard M5B1 Scout's gun, before the fourth hit causes the vehicle to catch fire and explode. If another vehicle explodes too close to it, then the explosion can send it flying to a short distance. This will damage the vehicle. It's important to note that these vehicles can sometimes be encountered in missions where they may sometimes be either indestructible or much more lightly armored. Unlike other vehicles, the Ballards' tires are bulletproof, and as such, it does not lose performance when shot in the tire.
Name
Unlike the DTWV-2 vehicles, these vehicles do not have a specified name for the series. However, if the M5B1's tank turret is were a modification to an original design, the "B1" designation may have been added to specify that modification, which would mean that the M5 is the default name. This corresponds with the designation system of the United States Military, which many of San Esperito's military vehicles are named after. Thus, the series can be called the "Ballard M5" series.
Ballard M5B1 Scout
This version has the turret of a tank.
Being armed with a tank gun, it's effective against all targets. A skilled operator can even shoot down helicopters.
There's a unique unmarked brown one hidden in a forest. The area has a few small houses and there are civilians walking around, but it's not known who owns it. It may be privately owned, or the area may be a hidden/abandoned military outpost. It's located in a small valley, surrounded by steep cliffs. The jungle keeps it completely hidden from aerial observation. Unless you want to jump off a cliff, it can only be approached from the north. The valley entrance has a wire fence with barbed wire at the top edge - just like the fences around some military bases. There's a gap in the middle of the fence, so it's not really obstructing anything. Be careful when driving it out, as the red barrel next to some wooden boxes will explode when hit. The vehicle would survive the explosion, but it would remove about 25% of its health.
There is a version with San Esperito Police Department markings that appears in Guerrilla sidemissions as a vehicle that needs to be captured. When the crew exits the vehicle, they are revealed to be soldiers rather than police. It's unknown why the military is operating police-marked Ballards.
See the video section at the bottom of the page.
Its turret looks similar to miniaturized turrets of the PzKpfw. V tank or T-34/76.
Locations and users
| Owner | Color | Location |
|---|---|---|
| Guerrilla | Green |
|
| San Esperito Military | Gray |
|
| Black Hand | Black |
|
| Rioja Cartel | Yellowish | |
| Unknown - unmarked | Brown |
|
| San Esperito Police Department | Blue |
|
Gallery
San Esperito Military version
.png "Ballard M5B1 Scout (military, front).png (677 KB)")
.png "Ballard M5B1 Scout (military, rear).png (693 KB)")
")
")
")
")
")
")
")
Black Hand version
- These pictures were taken on Isla Dominio except for the last one, which was taken at Guerrilla Safehouse 31.
")
")
")
")
")
")
")
")
.png "Ballard M5B1 Scout (Black Hand, front).png (755 KB)")
.png "Ballard M5B1 Scout (Black Hand, rear).png (719 KB)")
")
San Esperito Police Department version
")
")
")
")
")
")
")
")
")
")
.png "Ballard M5B1 Scout (police).png (239 KB)")
Guerrilla version
.png "Ballard M5B1 Scout (guerrilla, front).png (688 KB)")
.png "Ballard M5B1 Scout (guerrilla, rear).png (629 KB)")
")
")
")
")
")
")
")
.png "Ballard M5B1 Scout (Guerilla, Side).png (1.18 MB)")
Rioja Cartel version
")
")
")
")
Miscellaneous
.png "Ballard M5B1 Scout (hidden 2).png (339 KB)")
.png "Ballard M5B1 Scout (hidden).png (1.87 MB)")
")
.png "Ballard M5B1 Scout (unmarked, brown, hidden).png (630 KB)")
")
.JPG "Ballard M5B1 Scout (at Rioja 04 safehouse).JPG (2.72 MB)")
")
Ballard Sentry STRL - 14
This version has a multiple rocket-launcher turret.
The rocket-launcher has 12 visible rockets, but as all other vehicle weapons, it has infinite ammunition. The rocket-launcher cannot be effectively used against flying machines as it doesn't have much range.
In the beginning cutscene of Broadcast News, Tom Sheldon is playing JC1 (considered to be an easter egg) and he is controlling one of these. However, he doesn't have one in reality.
Locations and users
| Owner | Color | Location |
|---|---|---|
| San Esperito Military | Gray |
|
| Black Hand | Black |
|
| Guerrilla | Green |
|
| Tom Sheldon | Green |
|
| Montano Cartel | Purple |
|
Gallery
San Esperito Military version
")
")
")
")
")
")
")
")
Black Hand version
")
")
Montano Cartel version
")
Miscellaneous
")
")
Ballard Centronel AAWV - 21
This is the anti-aircraft version.
Armed with four barreled anti-aircraft autocannon, this version is effective against helicopters and low-flying aircraft, with it's great angle of vertical fire. The weapon cannot depress enough to effectively engage ground targets and is useless against ground vehicles. The turret has a little radar antenna.
The turret resembles the real world ZSU-23-4.
Locations and users
| Owner | Color | Location |
|---|---|---|
| San Esperito Military | Gray |
|
| Brown |
| |
| Black Hand | Black |
|
| Montano Cartel | Purple |
|
Gallery
San Esperito Military version
")
")
")
")
")
")
")
")
")
")
")
")
")
Montano Cartel version
")
Black Hand version
")
")
Miscellaneous
")
")
")
")
")
Trivia
- On all three of the vehicles, the wheels aren't actually attached to the underside, but rather the vehicle itself is floating above the tires. See picture above.
- The Harland series armoured vehicles have the same glitch.
- All three of the Ballards have a glitch where if you rotate the turret too fast, the entire vehicle will spin around, flip over, or possibly even launch in any direction. See above pictures.
- The Harland series armoured vehicles are also affected by this, thought not as severely because they have smaller turrets.
- The decals on the front and left side of the Ballard are always inverted, as seen in a picture above, but the decals on the rear and right side are normal.
- Unlike every other vehicle in the game, the Ballard will not immediately explode upon being turned upside down.
- For a certain period of time, the wiki stated that the Ballard's mounted machine gun was invisible, even though it is clearly visible on the front.
- Every faction in the game except The Agency has a variant of at least one of the three models of this vehicle.
- In fact, The Agency is the only faction that does not own a variant of the Ballard M5B1 Scout.
- From a screenshot from a video for Just Cause 4, a vehicle similar to the Ballard Centronel AAWV-21 returned as the Falconer AA Tank.
Acquiring the Black Hand variants from Isla Dominio
While incredibly difficult and time consuming, it is technically possible to move a Ballard variant from Isla Dominio to the mainland of San Esperito via amphibious transportation with a Pequod - Harpoon PC 350. This will be a very challenging feat to pull off and may require plenty of trial and error before you do it successfully. Should you make the choice to attempt this, the steps to do it are as follows:
- Step 1: Liberate Hacienda Coronado in order to unlock Guerrilla Safehouse 31 - Boathouse Camp. While this is technically an optional step, it is highly recommended, as this is the closest safehouse to Isla Dominio.
- Step 2: Begin the first part of Taking Out The Garbage.
- Step 3: When you reach the Jaeger 5FJ 7, turn around and head to the mainland. Then use Heavy drop to call in a Whiptail Gyrocopter. This step is optional, but will make your attempts much faster.
- Step 4: Fly over Isla Dominio and exit the helicopter, then paradrop down to the airfield on the south side of the island. You're aiming for an area about halfway along the airfield. with minimal trees that provide a commanding view of the road just to the west.
- Step 5 (optional): Hijack the Delta MAH-15 Chimaera that will spawn, then land it around the middle of the airfield, just behind your location. It can serve to reduce the helicopter spawning and provide a grapple point for you.
- Step 6: Watch the road and be patient. When the Ballard M5B1 Scout spawns, hijack it - but try not to go in while there are other vehicles otherwise they'll attack and potentially destroy you. If for whatever reason your attempt at hijacking it doesn't work, you can use the Chimaera as a grapple point to return to the airfield runway and wait for another chance.
- Step 7: Once you acquire the Ballard, drive down the airfield and turn off into the forests to the east. Then follow the shore until you reach a small clearing just before the SAM site near the corner of the shore.
- Step 8: Park the tank at the edge of the cliff and get out, then run down to the water and hijack a Pequod - Harpoon PC 350.
IMPORTANT: If you enter another vehicle after the Pequod, it will cause the Ballard to despawn. DO NOT enter any other vehicles. If you need to clear out any other boats, use your guns.
- Step 9: Drive the Pequod under the cliff, getting as close as you can, and line up the rear deck with the shoreline as best you can. It helps to tap the reverse button lightly, as the boat will then drift into the shore and stop completely. Don't let the boat drift, make sure it's as still as it can be.
- Step 10: Return to the Ballard and line up with the rear deck of the Pequod. Back up to the small hill just behind you, then floor it. Floor it at full speed and attempt to land straight on the back of the Pequod. If you land on the boat successfully, then now's the time to make any adjustments to secure the Ballard as best you can. You won't get a chance later.
- Step 11: Exit the tank and get in the Pequod. Now comes the hard part.
- Step 12: Going incredibly and extremely slow, gently begin sailing away from shore and move northward. Make sure you watch the wheels on your Ballard - because the tank moving will trick the game into thinking it's rolling, which will in turn make the wheels spin and exert a port or starboard force upon the Pequod that may be too strong to counteract depending on the wheel speed. Work with it if possible, but slow down if the force is too strong for you to counteract gently. Remember that moving slowly and keeping the Ballard on your back is your first priority.
IMPORTANT: DO NOT GET OUT OF THE PEQUOD AFTER THIS POINT
Normally when exiting a Pequod, Rico will appear on the back deck - right where the Ballard will be parked during this. Getting out will result in appearing inside the Ballard, which in turn will cause instant death, so if you need to get out of the boat (which you probably won't have to, anyway), use the stunt position instead.
- Step 13: While you're restricted to moving incredibly slowly, still try to get as far away from Isla Dominio as possible, as soon as possible. At any point during this step a Black Hand boat could spawn, or a helicopter, or any number of things that could then attack you and damage the boat or stop you from losing your Heat.
- Step 14: This step is pretty important: just relax and keep your fear under control. By this time, after having done the previous steps several times due to its tendency for failure and subsequent repetition, you'll probably be very nervous and fearful to lose your progress. To which I say, just breathe. After you're out of Isla Dominio's heat zone and you're free of the threat of the Black Hand, the only thing that can really stop you now is yourself. Don't get greedy, don't take any risks, just go slowly and gently. Keep your speed low and your turns (if necessary) gentle. Breathe and keep it under control. Relax. You'll be fine. You'll get there. It'll take as long as it needs to, just be patient and keep on sailing.
- Step 15: When you reach the mainland shore, beach the Pequod. You might need a slight (but careful) burst of speed as you're coming in, because it's good to try and completely beach the boat, leaving nothing but sand below it. As a result, if the Ballard falls off in its own here, then it'll be on the shore and you can continue.
- Step 16: DO NOT EXIT THE PEQUOD CONVENTIONALLY IF THE BALLARD IS STILL ON THE REAR DECK. If you've beached the Pequod and the Ballard is still on your back, use the Stunt Jump position to get to the roof of the boat, then leap off. After that, try to jump onto the deck of the Pequod itself. Once you're there, get in the tank and drive off. If you accidently get in the boat again, THEN I REITERATE YOU MUST USE THE STUNT JUMP POSITION TO GET OUT OTHERWISE YOU MAY INSTANTLY DIE.
- Step 17: Once you're inside the tank, drive off of the boat onto the beach. If you're stuck on the boat and can't move, (this probably won't happen to you, though, but just in case,) then use the physics glitch to dislodge yourself. Switch to the main cannon and wiggle it slightly to free yourself, then drive off onto the shore.
- Step 18: Go straight to Guerrilla 31. Technically you can go to any safehouse you want now, but after all the previous steps you'll want to save as soon as possible because you did it. So that's why you need Guerrilla 31 unlocked.
- Step 19: Put the Ballard in Guerrilla 31's garage, make sure you're far enough away for the door to close, then use grenades to kill Rico. The mission will fail, after which you can press abort and return to free roam.
- Step 20: You'll probably spawn at Guerrilla 31. Save the game - this is the earliest chance for you to do it, and you'll want to do it as soon as possible.
- Step 21: After the game is saved, go to the garage at Guerrilla 31 and celebrate. You did it - and you never have to do it again.
Attempting this, should you choose to do it, will be very time consuming and extremely difficult. It will most likely take multiple attempts, and plenty of trial and error to get right. Good luck.
Notes
- Theoretically this can be done for all land vehicles from Isla Dominio, though it has only been tested on the Ballards, so in other cases, this may not work.
Video
This video shows how looks two versions of the Ballard M5B1 Scout: the Military and Guerrilla version's

(HD) Ballard M5B1 Scout, version Military and Guerrilla (ERL) - Just Cause 1